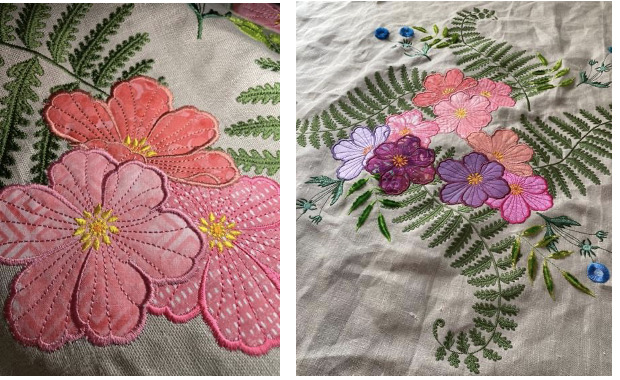
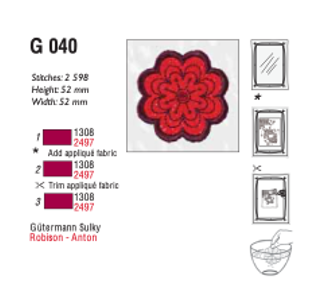
Original pattern by Marie Duncan, edited by Letitia Moore
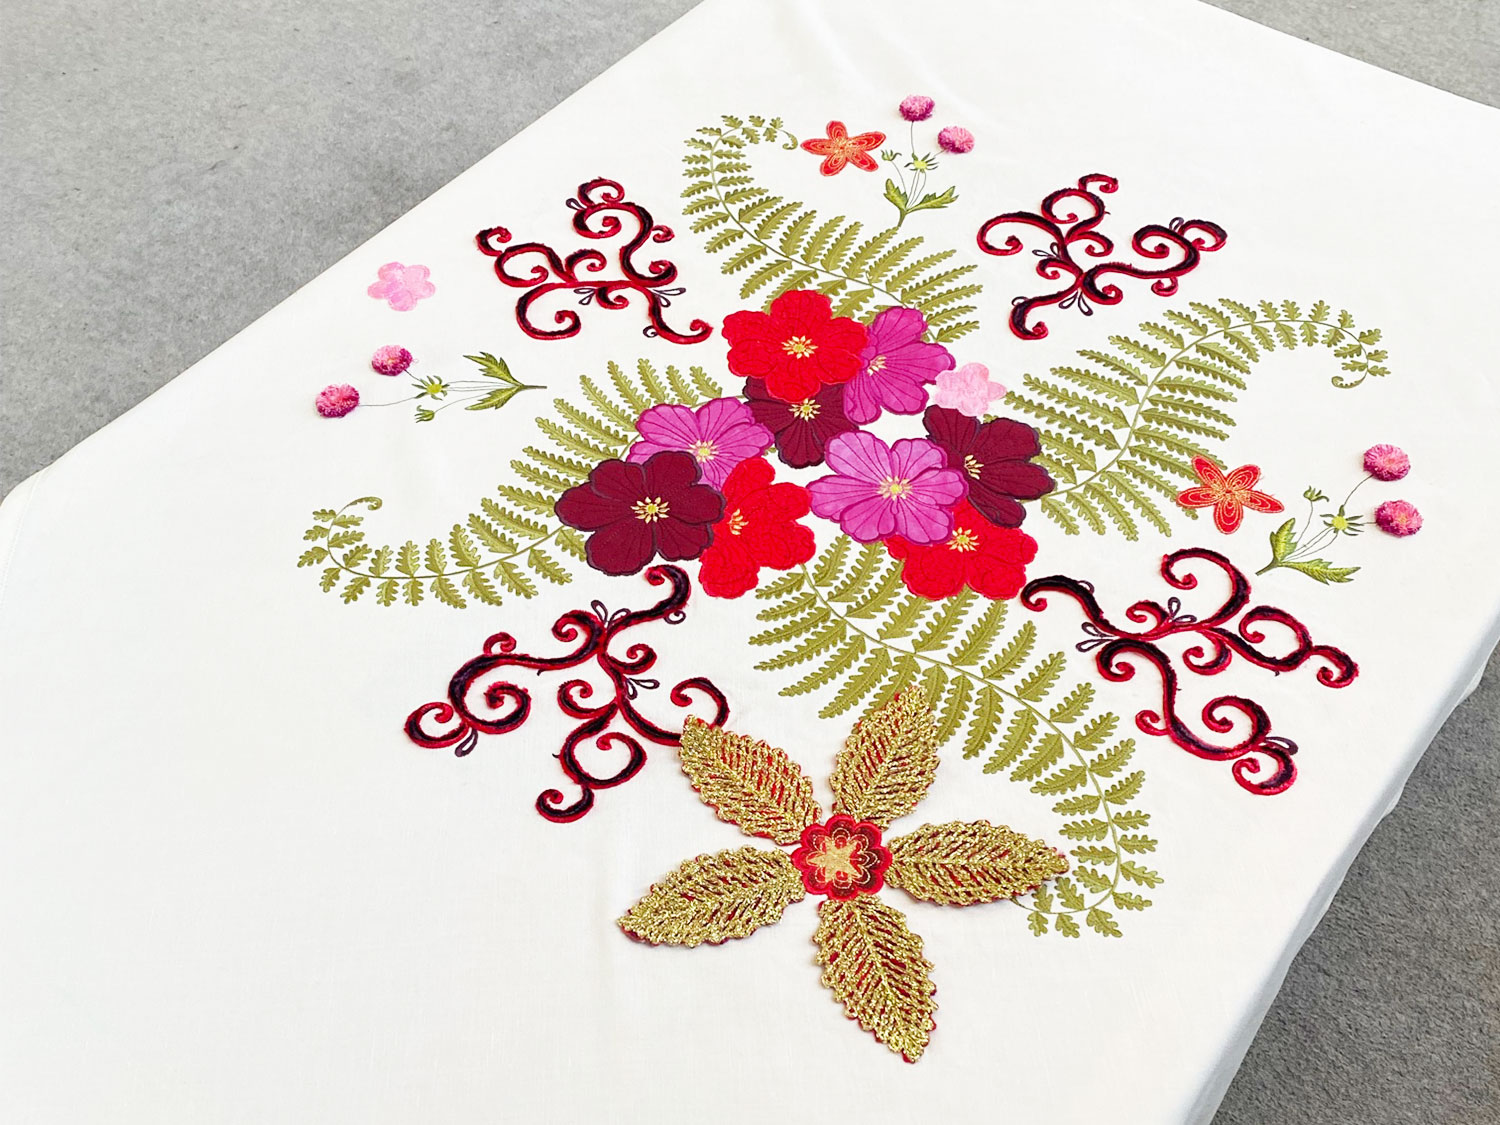
Welcome to the wonderful world of specialty embroidery techniques. Learn how to make a table topper with 3D, Thread Velvet, Applique, and Tassel embroideries. Not to mention a beautiful hemstitched edging.
We are going to enter the wonderful world of Specialty Embroidery. The designs we will use are in the HUSQVARNA® VIKING® DESIGNER EPIC™ 2. You can substitute designs you have. Your choice! The table topper will be absolutely lush and filled with texture and fun in all your favorite colours. We will finish the hem with hemstitching. The result will be scrumptious and exquisite!
Supplies:
- INSPIRA® Tear Away Light Stabilizer 12" x 25 yards (6201127-96)
- INSPIRA® Tear Away Stabilizer 12" x 5 yards (6201200-01)
- INSPIRA® Tear Away Stabiliser 12" x 10 yards (4166133-04)
- Aqua Magic Stabiliser 12" x 5 yards (6201202-01)
- Assorted DESIGNER Hoops
- Yarn Couching Feet Set (9202150-96)
- Robison-Anton cotton thread to match your linen
- Robison-Anton rayon embroidery thread
- Bobbin thread
- 1 ⅓ yard of heavy weight linen (more if you choose to make it larger)
- Scraps for applique
- Inspira size 100 Wing Needle (6201056-96)
- Spray starch
- Yarn
We are going to do a LOT of embroidery so it is recommended that your spray starch and press. The stiffer your linen is, the better!
Let's Embroider:
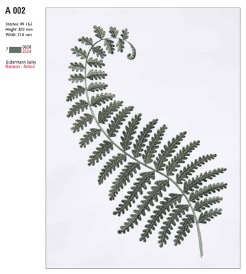
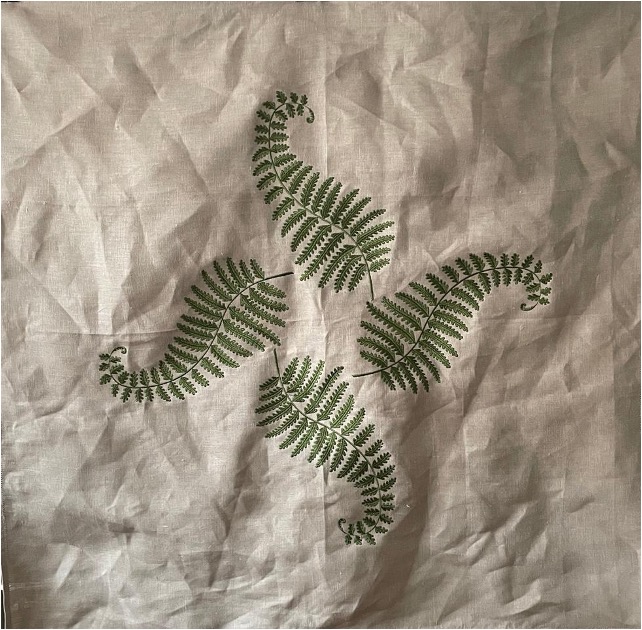
The placement of the embroideries in this project do not need to be totally precise. This is a project where we will be “sticking a flower here, or maybe there….”! You will see as we go along. The initial design that we will do is the placement of the greenery base. Flowers will then be stitched on top of it here and there. I used design A002 from the Signature designs in the HUSQVARNA® VIKING® DESIGNER EPIC™ 2 but you can use whatever designs you would like for the greenery base.
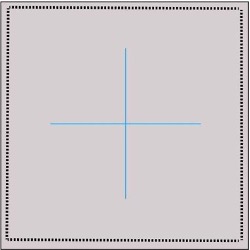
- Mark the center of your square as shown.
2. Thread with Robison-Anton rayon embroidery thread on top and bobbin thread in the bobbin
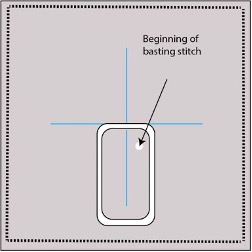
3. Bring up your design and select “Baste around Design”.
4. Hoop two or three layers of INSPIRA® Tear Away Light Stabilizer or one or two layers of regular INSPIRA® Tear Away stabilizer. I like more layers of light because it tears away cleaner, with less stress to the embroidery. It is important that you tear away as much stabilizer as you can after each embroidery because we will be stitching on top of it with other designs as we go forward.
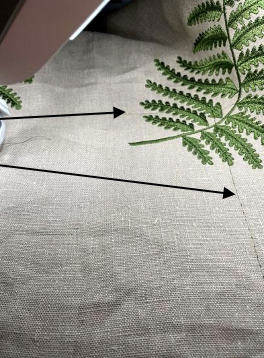
5. Hoop the first design with the back of the hoop at the marked horizontal line and the center marks of the hoop top and bottom in line with the vertical line of the fabric as shown. The bulk of the fabric will be to the back of the machine.
6. Touch GO and baste the fabric in place.
7. Embroider your design.
8. Repeat with the other three greenery designs. As you start hooping the subsequent designs, the machine will baste over the previous design. That is fine.
Now it's time for the fun part...
We are ready to bring on the flowers. We will explore a number of different techniques, as we create our “flowerful” center for our table topper. Which designs you choose is completely up to you! I will tell you what I used, but there are no rights or wrongs. Play around, and try out the different possibilities. Do be aware we are stitching on top of the stitching. You need to stabilize very well! I found it easiest to hoop several layers of stabilizer and baste the table topper to the stabilizer. Hooping the fabric itself would be difficult because of the bulk. Let’s get started!
Chenille Embroidery:
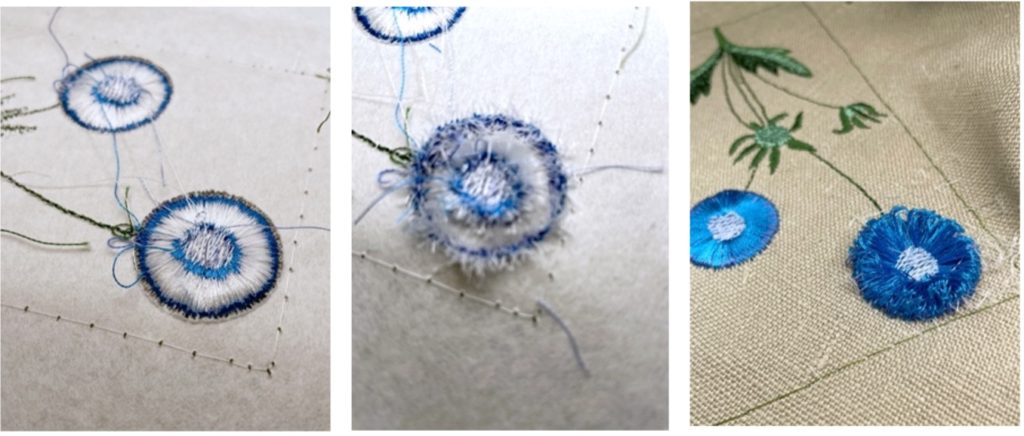
These are some of the Chenille designs built into your HUSQVARNA® VIKING® DESIGNER EPIC™ 2. They are sometimes called fringe designs.
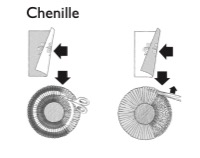
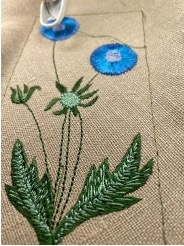
- To do a Chenille/fringe design you will stitch the design with layered colors. Look up at M062. You can see the blue flowers have three different blues. They “pile up” as they are sewn, and then when you finish the embroidery, you cut and remove the bobbin thread as shown here.
2. I used M062. As you are stitching the designs, be sure that the stem points to the center of the fabric. The placement isn’t exact. I used a 10” approximate measurement from the fern stem to the top edge of the basting. Baste around the design.
3. The first stitching will be the darker blue. Then you will thread with a lighter blue and it will stitch over the first blue stitching.
4. Finally, you will stitch the center. The center of the flower overlaps the ring of chenille/fringe stitching to hold it in place after we remove the bobbin thread.
5. Finally, you will finish the rest of the design, the green leaves and stem.
6. When the design is complete, turn over the hoop and using small, sharp scissors, snip the bobbin thread.
7. Then on the right side, “fluff” out the stitches! Isn’t your flower wonderful????
Next on our list is Thread Velvet
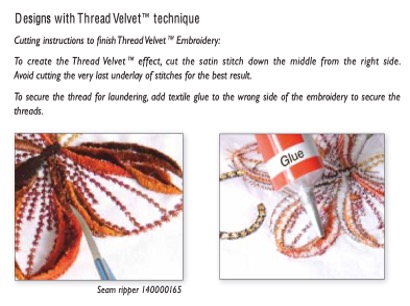
Thread velvet designs build up stitches like the Chenille designs did. The difference is that where we cut the bobbin thread with the Chenille designs, with Thread Velvet we will be cutting the top thread layers. The instructions show cutting the layers with your seam ripper, or you can use a scalpel blade or similar very sharp pointed scissors. You need to be careful to not cut through the bottom layer of fabric.
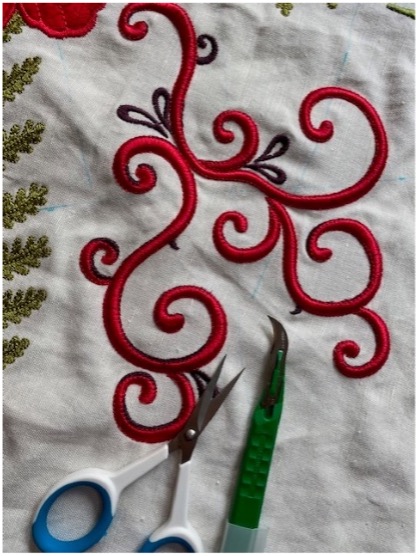
I used the Thread Velvet Scroll design.
- Bring up your design. B086
- Stitch out the colours. You will see the two different colours (in this design) build up over itself. After each layer of thread, it straight stitches close to the edge, securing it in place.
- After your embroidery is complete, snip through the top threads using either your seam ripper or sharp pointed scissors. After all your Thread Velvet is done, you can hold a steam iron over the embroidery and give it a burst of steam. Watch it Bloom!
Our next adventure is going to be Yarn Embellished embroidery...
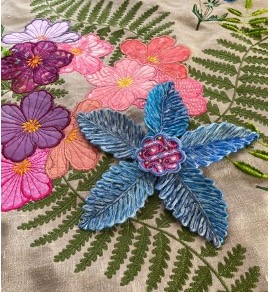
The Yarn Couching Foot set comes with two feet, guides for the yarn and a threader. It also has instructions for use. The two feet have different-sized openings for the yarn to thread through. Try your yarn in both feet, to determine the one you need to use. The yarn must fill the foot, but flow freely.
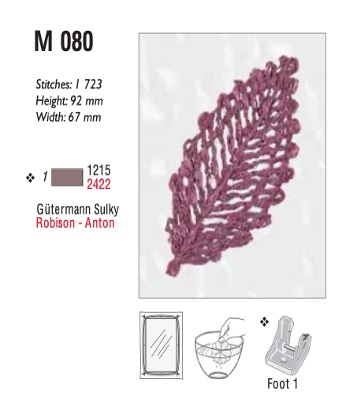
- I used design M 080 from the HUSQVARNA® VIKING® DESIGNER EPIC™ 2. It is a leaf design, but I’m using it as a flower!
2. Hoop two layers of Aqua Magic™ Stabilizer in your 200 x 220 Hoop.
3. Bring up Design M 080. This design is digitized to be sewn on water-soluble stabilizer. It is necessary for the design to be digitized this way or it will fall apart when you soak away the stabilizer! Ask me how I know!!!
4. Test your yarn in your two feet to determine which is best.
5. Bring five leaves into the hoop.
6. Touch Go.
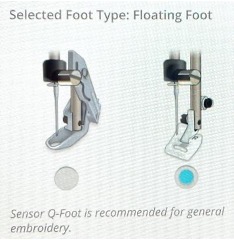
7. Check the Floating Foot option under Selected Foot type as shown.
8. Place the yarn guides on your machine as indicated in your instructions or if desired, guide the yarn by hand from the front of your machine. That is actually what I prefer. Try it both ways.
9. Thread your yarn through the foot.
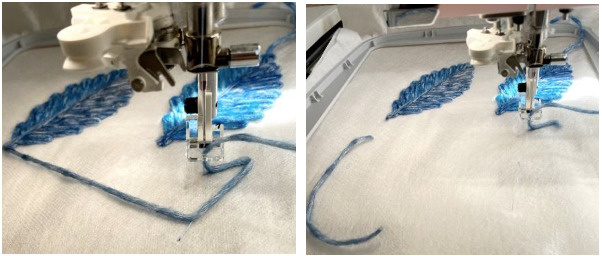
10. Embroider the first leaf/petal. As the machine moves to the next leaf, it will carry the yarn. Stitch the first few stitches of the next leaf, then stop and cut the carrying yarn as shown.
11. Continue stitching leaves until the five are done.
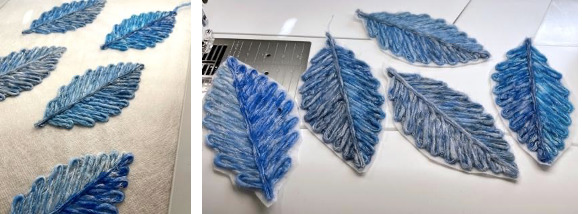
12. I then repeated the same process above and stitched a second layer of metallic yarn over the top of the existing leaves.
13. Cut away the excess stabilizer close to the yarn.
14. Soak in hot water for a few minutes and then rinse.
15. Set your leaf/petals aside to dry.
Let's Applique...
To fill in the center of our design, we are going to do some applique designs.
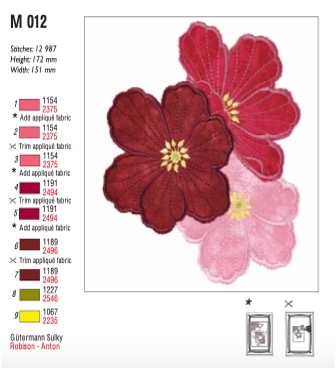
- Select M012 or the applique design of your choice.
- The stitching order and instructions are shown here. The flowers are beautiful, and will cover anything needed, very nicely. Mine ran over some thread velvet and still looked GREAT!
- I did three groups of flowers, covering many of the stem ends. Don’t worry if all is not covered, there’s more to come!!!!
Plant the Yarn Flower...
Before we plant our yarn flower we need to stitch out a center. Because of the bulk of the yarn, I decided that a free-standing center would be best. Design G040 is perfect! It is an applique design.
- Hoop your 200mm x 200mm hoop.
- Embroider the first colour of the flower. This will show you where it will be positioned.
- Select colour one again and resew the outline with your foot control and position the 5 leaves/petals as you go around to tack them down.
- Complete the rest of the applique flower design.
5. I manually stopped the machine when the satin stitch outline was finished and changed to another thread colour to sew out the centre of the flower.
Fill in the blanks...
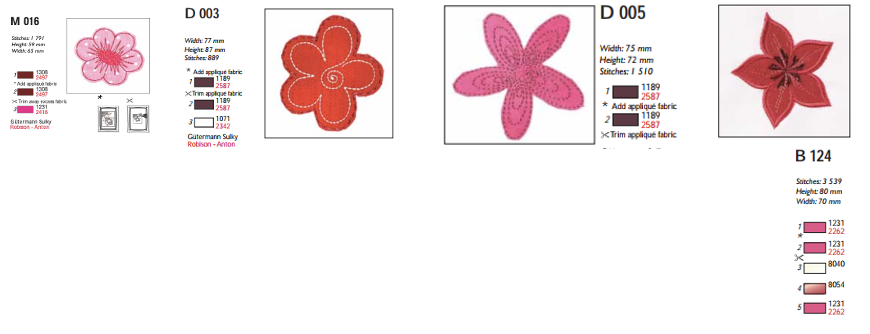
- To fill in the blanks and cover any remaining stem ends. Here are a few designs that work well.
- M16 is a raw edge flower. The edges are straight stitched instead of satin stitches.
- Some designs that work well for filling in the blanks are D003, D005, B124 and M016 shown here.
- After your designs are complete, give your topper a good steam pressing ready for preparing the hem.
Hem:
- We will be hemstitching the border on our table topper, so the first step is to pull threads and cut a 42” square on grain. You can make it larger or smaller as desired, for your table.
- Once you have your square cut, measure in 1 5/8” from each edge and pull another thread. This is the marker where you will bring the raw edge to and where you will stitch your hemstitching.
- Fold a double hem so that the edge of the fold is even with the pulled thread as shown.
4. Fold and press all four sides.
Let's Hemstitch:
- Before we actually start our hemstitching, we need to miter the corners and straight stitch our hem in place.
- Thread with cotton thread on top and in the bobbin. The thread NEEDS to match your fabric. You want the thread to blend in and disappear on the first round of sewing, and then for the hemstitching, the texture and holes created by the wing needle should be what you see, not a contrast thread.
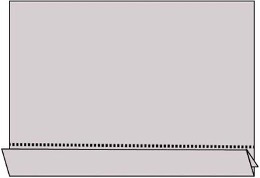
- Start by unfolding one fold of the hem in the first corner as shown. You have only a single fold now, not a double fold.
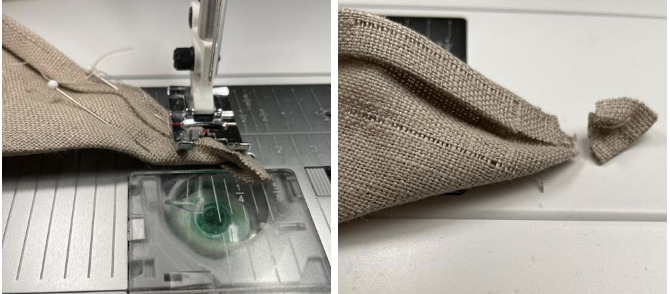
4. Fold the corners to match as shown, and pin. The bottom fold should be parallel to the front of the machine as shown.
5. Stitch the miter. Unfold and check it. Be sure it is correct, then trim the excess fabric away.
6. Repeat for the other three corners.
7. Turn the hem right side out. Good job!!!!
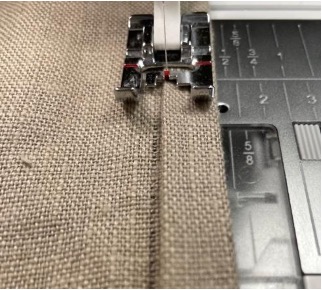
8. Next, stitch the hem in place as close as possible to the edge of the fold. We are doing this because we can stitch with the IDF. (If your machine does not have IDF, you can use the Interchangeable Dual Feed) This keeps the fabric from slipping or feeding the layers unevenly. When we start the hem stitching in the next step, we can’t use the IDF with the hemstitch, and it could shift slightly. This way we have a secure hem, that will stay in place as we hemstitch.
9. Now we are ready to hemstitch. Insert a size 100 INSPIRA® Wing needle.
10. Leave the matching thread in place.
11. Select C6
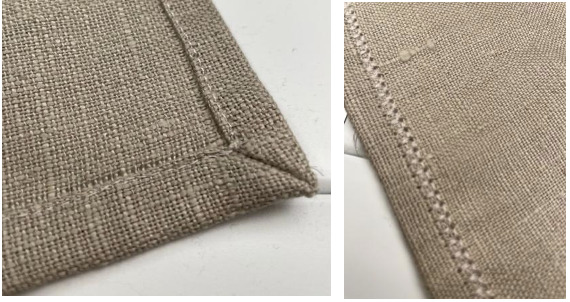
12. Stitch so that the left hand row of stitches enter the pulled threads and the right hand row of stitches jump over onto the hem.
Also, you can use stitch C8. Change the Stitch Width to 4.0 and Stitch Length to 3.5. Position your already sewn hem (right side up) stitching in the middle of the foot and this stitch will stitch either side of it and hides it nicely.
Don’t forget to share your projects with us on Instagram, tagging @husqvarna_viking_australia and using the hashtags #keepingtheworldsewing or our Facebook page Husqvarna Viking Australia.
