
The festive season is now upon us! Why not create an embroidered Christmas Angel Tree Topper to feature on your Christmas Tree.
Requirements:
- Any Husqvarna Viking embroidery machine
- 1 Piece of Iron-on no show mesh 14" x 14" (36.5cm x 36.5cm). This will not be removed from the project as it will give body to the angel.
- 1 piece of white crystal organza 12” x 20” (31cm x 51cm)
- 1 piece of wash away stabiliser 12” x 20” (31cm x 51cm)
- 1 piece of Tear Away 16” x 16” (41cm x 41cm)
- White embroidery thread and white bobbinfill
- White sewing thread and hand sewing needle
- Small amount of toy stuffing
- Fabric glue or hot glue gun
- Circular Sewing Attachment (To suit your model of machine)
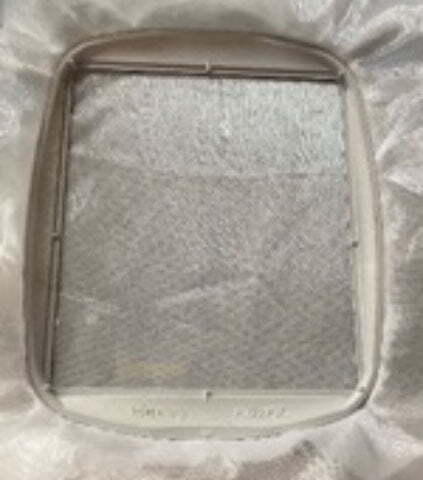
- Embroidery hoop, no smaller than 150mm x 150mm
- “B” Foot or Open Toe Foot
- Click here to download the Angel Wings design.
Construction:
Embroidered Wings:
1. Upload the Angel Wings embroidery design into your embroidery machine.
2. Hoop up both the wash-away stabiliser and crystal organza.
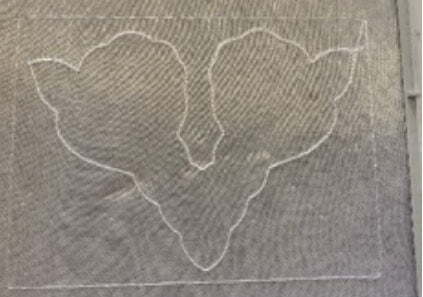
3. Select the Baste Around the Design feature on your machine. This needs to be done to ensure that the organza lays flat in the hoop.
TIP: Use your foot control when basting as this allows you to totally control the speed and you can smooth out the top fabric as you go around.
4. Ignore the first Stop command in the embroidery as you already have your organza in the hoop.
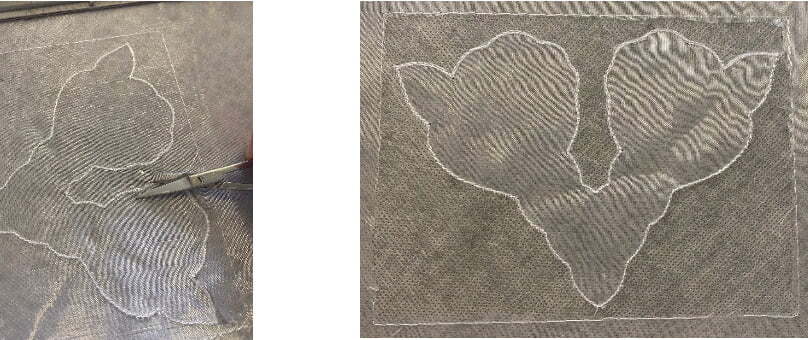
5. On the second Stop command. Remove the hoop from the machine and lay it on a flat surface. Get a pair of pointy nose scissors between the organza and the wash away (do not cut into the wash away) and trim very carefully around the stitched line of the design. Then cut off the excess organza back to the basting line.
6. Continue the embroidery design until completed.
7. Cut excess wash away from around the design and then rinse in warm water to dissolve the wash away. We do not want to completely wash out the stabiliser as we need it to act as starch as it dries.
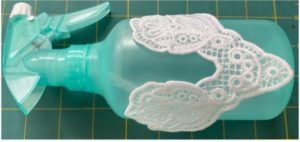
8. I placed the wet wings over the outside edge of a bottle and let it dry thoroughly so that they had a curved shape when dry.
Angel Skirt
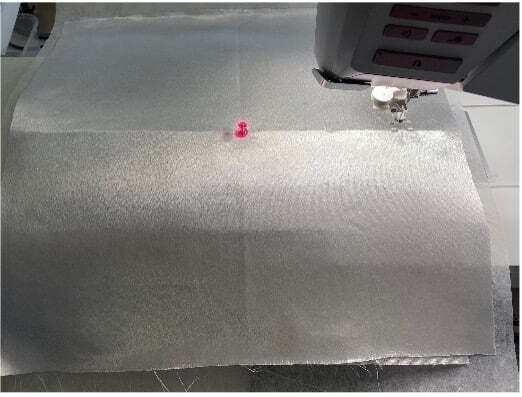
9. Iron the fabric stabiliser onto the back of your white satin.
10. Measure and mark the centre of the 14” x 14” (36cm x 36cm) square. Place the 16” x 16” (41cm x 41cm)Tear Away underneath.
11. Attach the Circular Sewing Attachment. Move the slider out to its furthest position.
TIP: Before you put the pin into your centre mark, place a small, folded piece of tear-away about 2 layers in a 1” square underneath the centre mark. This will support the fabric from being stretched and leaving you with a gaping hole in the centre of your fabric.
12. Attach your “B” foot or Open Toe foot.
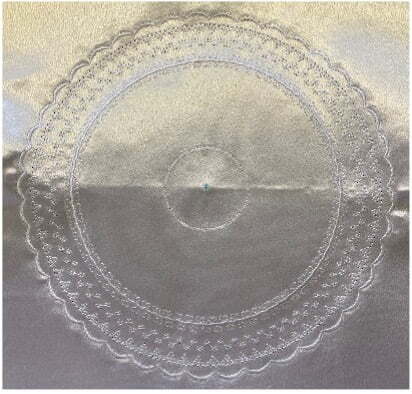
13. Select a decorative stitch (I would recommend that you test on a scrap piece of fabric first) and sew carefully around the circumference of your circle. Ensure that your fabric lays flat and doesn’t bunch up. If you only have a smaller Christmas tree, then do a scalloped satin stitch as your outer circle. If you want a bigger angel with a longer skirt, start with a non-scallop stitch as this can be sewn later.
14. Sew another 2 or 3 lines of circular decorative stitches to create a decorative hem. Just move the slider on the Circular Sewing Attachment back towards your needle.
15. Now move the slider on the Circular Sewing Attachment as far as it will go towards the needle. Select the triple stitch centre needle position and sew the circle. This gives you the position to create the Angel’s head.
16. Remove the Circular Sewing Attachment.
17. Now if you want to create a larger skirt for the angel you can now add more rows of decorative stitching until you reach the required length. Ensure that the last circle is a satin scallop. Remember this time you will be the one guiding the stitching around the circle so take your time and use your Needle Up/Down function for pivoting.
18. Remove the excess tear away from the back of the fabric, particularly around the centre circle.
19. Very carefully trim close to the outer satin stitch scallop stitching, but not close enough to cut the stitching. Remember you do have an iron-on stabiliser behind so your satin so it should not fray.
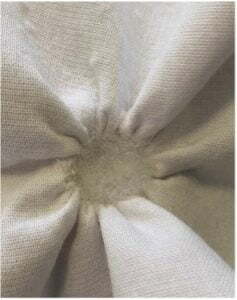
20. Thread up your hand sewing needle with white sewing thread, double up and tie with a small knot at the bottom. On the wrong side of the fabric place a running stitch around the centre triple-stitched line. This will be your gathering stitch. Start to gather up the thread and then poke in the toy stuffing until you get a nice round head shape. Then pull up your thread to close the opening as best you can and tie it off.
21. When your wings are dry use a small amount of glue and stick the wings on the back of the satin fabric just below the head.
Congratulations on finishing your Angel Tree Topper!