
They say ‘Christmas is the season to eat, drink and be merry’, so what is a more perfect way than to make these personalised coasters.
This is a great quick project for personalised gifts for Christmas using the Circular Attachment for the whole project, from whoa to go!
Machine Requirements:
1 - Husqvarna Viking Sewing Machine
2 - Circular Attachment to fit your machine:
a) Part # H9203440-96 for #8, 9
b) Part # H9203920-96 for #1 – 7*
3 - Husqvarna Viking Piping foot part # H4130971-45
*Check the Accessory Users Guide for more information
Cutting Insructions:
1 - Cut main fabric into (2) 15cm strips
2 - Press heavy duty stabiliser onto wrong side of one section of your main fabric. Cut into 6 equal pieces, approx. 18cm long.
3 - Press Pellon not wrong side of 2nd main piece of fabric. Cut into 6 equal pieces.
4 - Cut contrasting fabric on the cross 2 ½ cm wide. Make enough for 3 metres when joined.
Sewing Instructions:
1 - Attach A foot, thread up with construction thread and make the bias-cut fabric.
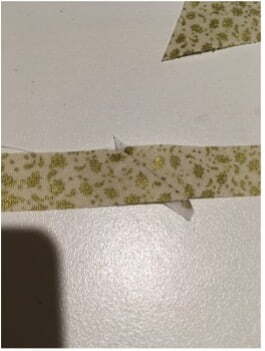
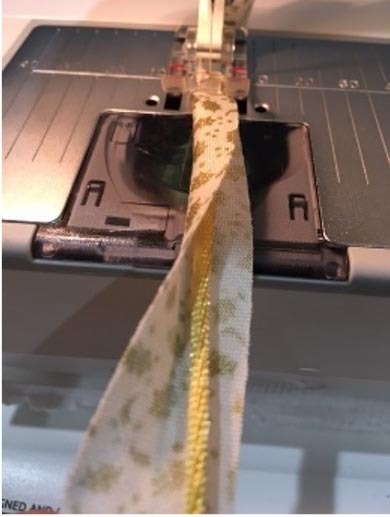
2 - Attach the piping foot and place the rattail down the centre of the fabric. Place the groove of the foot over the cord and sew the complete 3 metres. Set aside.
3 - Keeping the piping foot on the machine, attach the circular sewer to the machine, making sure the metal lugs on the attachment are firmly in the slots provided on your needle plate, and the ruler section is on your left. (Refer to the manufacturer’s instructions located in the box.)
4 - Move the slider to the 12cm mark.
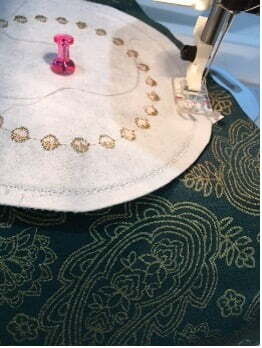
5 - Take one of your prepared pieces of fabric backed the heavy stabiliser. Place the metal prong into the centre of this piece with right side uppermost. Cover prong with plastic topper as provided.
6 - Using straight stitch, sew around your piece, keeping your finger gently on the stopper. Remove from machine and make a mark where the prong went with the water-soluble pen. Cut around the outside of this circle, leaving 1cm seam allowance.
7 - Place the piece back onto the prong in the same spot.
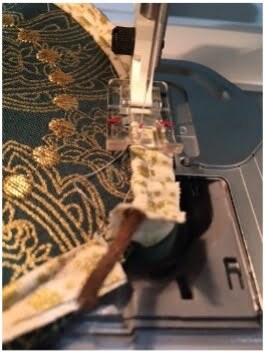
8 - Take the prepared piping and place under the foot as previously, making sure you have a little excess fabric without the cord in it to start. (This makes it much easier to begin and end). Sew around the circle using the previously sewn stitches as a guide. This is easy as your attachment does this for you! When finished, pull a little excess cord out and clip back to remove bulk.
9 - Change to gold embroidery thread and place B foot onto your machine.
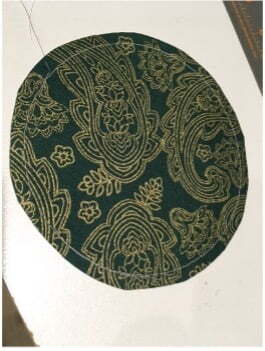
10 - Move the slider to the 8cm mark in the ruler, choose a satin decorative stitch to suit. Choose a stitch that isn’t too long in stitch length and with a forward motion only. This makes it much easier to sew on a small project. Sew around the coaster – you will be amazed how the design often joins up miraculously! If this doesn’t happen, lock off in time to join up with the beginning stitch. Take fabric off the machine.
11 - Change back to piping foot and construction thread. Move slider back to 12cm mark.
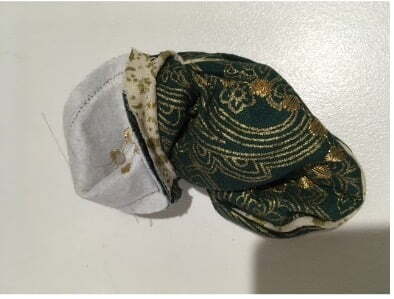
12 - Take your backing fabric piece with Pellon on and place onto the prong with the right side upper most. Place the completed circle on top wrong side up.
13 - Select a straight stitch at 3.0mm. Sew around the piped edge on the previously stitched line. You may need to move your needle position a tiny amount, approx. 0.5, so that you are on the exact line of stitching. Keep your finger on the stopper to make sure everything stays in place. Leave a gap of approx. 3.5 cm to turn the coaster through.
14 - Remove from machine and trim around the whole piece. Now turn through – it may be a bit tricky with the heavy stabiliser. Press to finish, making sure the gap is neatly turn in.
15 - To complete, thread up again with gold thread, attach B foot and place coaster back onto the centre mark, (hopefully you can still see the hole). Move the needle position to -1.3 and sew a straight stitch around to neaten.
16 - Happy Christmas and enjoy sipping your champagne with your new coaster!
Congratulations on finishing your project!
We can’t wait to see what you create! Don’t forget to share them with us on Instagram, tagging @husqvarna_viking_australia and using the hashtags #keepingtheworldsewing or our Facebook page Husqvarna Viking Australia.